Several people have asked about my paper bag floor that I did in my dining room. I am currently working on the same floor in my office and decided to try to show some images and videos as I do the work so you can watch and learn. Hopefully, this will help you to create your own new floor in your house! And by the way……this REALLY IS THE BEST THERAPY EVER!! Not only does it help me to relieve stress, but it enhances the look of my home!
Check out the website where I found this idea for detailed directions and list of items needed:
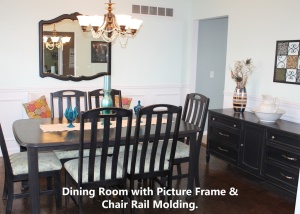
Dining Room Floor
Now on to the office:
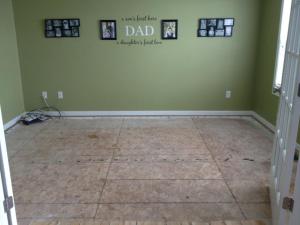
Removing the carpet is quite simple. I did not cut carpet with a razor blade because the room is a perfect square. I just pulled up, rolled up, and hauled out. The hardest and worst part of the entire job is pulling up the tack strips and removing all the staples from the padding. I use a chisel and hammer for the strip and needle-nose pliers for the staples. I HIGHLY recommend knee pads and gloves too. Here is a short video to show the process:
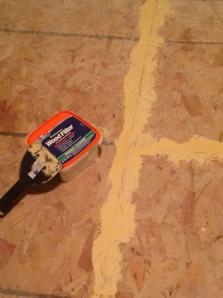 Next you must fill all the cracks and any holes or blemishes in the plywood with wood filler. I used Elmer’s Wood Filler and a putty knife. After drying overnight, I lightly sanded. It is okay if not perfectly smooth, because the texture is actually better for the effect….but you don’t want bumps.
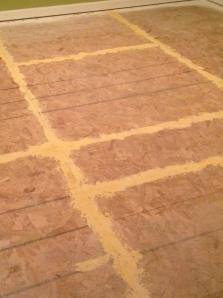
After the prep work, you are ready to start laying the floor. Tear the craft paper into a variety of shapes and sizes. (I usually use 8-12 inch diameters). I left my paper flat until I was ready to use, this way I could see the size and shape of the paper. I found that was easier for piecing together the “puzzle”. Mix your glue mixture in a large bowl or bucket. I found my paper stuck best with a 2:1 ratio water to glue mix. Ex: 4 cups water, 2 cups glue. Crinkle one section of paper, place into the glue mix and lay on floor until ready to use. Then unfold and smooth onto the floor. Watch this quick video to get a visual of laying the paper.
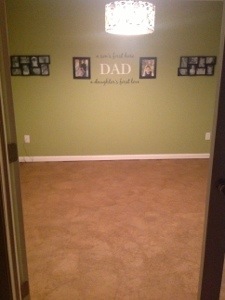
All paper is now laid and drying. Stain goes on tomorrow…..
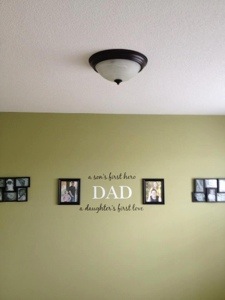
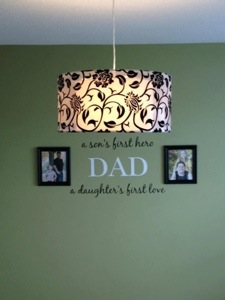
I also added a new light fixture today to add to the new look of the room. I love it!
Today I stained the floor. I started by using a chip brush all around the room by the baseboards. I then used a wood stain block & pad with extension pole to spread the stain onto the floor. I like to put it on in a circular motion so there aren’t any visible streaks. Work your way out of the room. This brief video shows how I apply with the block & pad. Don’t push too hard, because you do not want to risk tearing the paper. Also, you don’t want the stain to be too wet or it will take a lot longer to dry. I really spread my stain by pulling and dragging it to other sections. The stain absorbs very quickly to the paper.
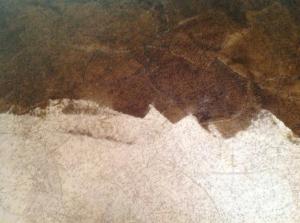
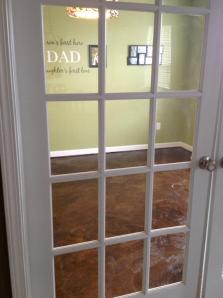
The stain color I used was Minwax Dark Walnut (oil based). Let dry at least 8 hours. It will still be a bit tacky to the touch, but should be ready for the poly after that amount of time (or overnight). Pictures below show as stain is being applied, the difference with the stain and without. The last picture is after all stain is applied and the doors are closed to try and reduce odor. 🙂
Last step, and by far the easiest….applying the Poly. I used the same wood block but with a lambs wool pad. I vacuumed the pad to eliminate any loose lint before starting. I used another liner for my paint pan to make cleanup easy. All you do is dip the pad and spread onto floor. This goes on very easy and I prefer to do a light coat (not too thick or you will see a visible haze) so the drying time is quicker between coats. Apply 8-12 coats depending on the area you are doing and taking in to consideration high traffic vs low traffic. I used 8 coats in my dining room and still have no scratches or blemishes. Allow at least 1 hour between coats to dry. I use two fans to help speed up the drying. Here is another quick demo. (Yes I’m in my pajama pants…it was late at night).
[http://youtu.be/sYx7o0ued3s]
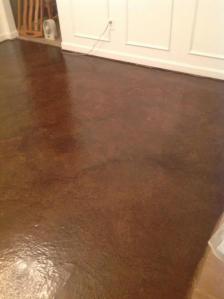
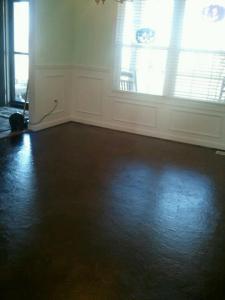
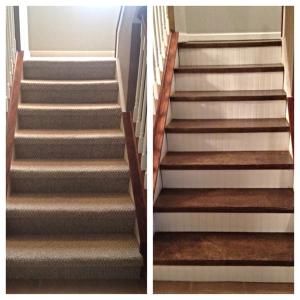
UPDATE: The floors are holding up great! We even have a large lab dog now too and we don’t have any scratches or tears. I also did this on my stairs. Below is a picture:
This is great! I was not able to see the YouTube videos because they were private.
I fixed the videos so you can now view. Can you tell I’m new at this? 🙂
This is a great idea!!! Wish I’d seen this before I spent money on less than desired tile for my basement. I have looked at a number of YouTube videos on this type of project and feel that your “wet” glue technique is better than the dry brush on glue others are using. Appears you get no bubbling or ridges that other videos show can happen. Note: Several DIYers have indicated that the brown paper has a “right” and a “wrong” side which only means one side will show lighter than the other. When I tackle this project for my dining room, I’ll keep the “curl” of the paper in mind has I go. Thank you so much for the videos; very helpful.
Penny, I’m currently doing this application on my stairs too. I’ve never noticed a right/wrong side to the paper, so I wouldn’t worry too much. Also, if you are staining it will all be a different color anyway. Good luck! Post pictures of your project, I’d love to see the results.
I added a new photo of my finished stairs!
Do you also use an oil-based poly?
What’s your favorite poly to use?
Did you sand the poly after any coats? I saw on some other tutorials, they recommend sanding after the first coat and before the last. What’s you thoughts on sanding poly?
Sorry for the delayed response. No, I did not need to sand between coats.
What kind of subfloor is that?
Just regular plywood that the builders put down.